I’ve made this project during project week in high school. This timer can be useful for timing races over short distances, because the result is more accurate than using handheld stopwatch. The average reaction time of a human is approximately 0.25s which is a lot when the total time can be as low as about 7 seconds.
List of parts that I used to make this project:
- Pro Mini Module Atmega328 3.3V 8M For Arduino Compatible
- Photoresistor
- I2C IIC Serial 128X64 OLED Display For Arduino
- Tactile Push Button Switch
- Laser pointer
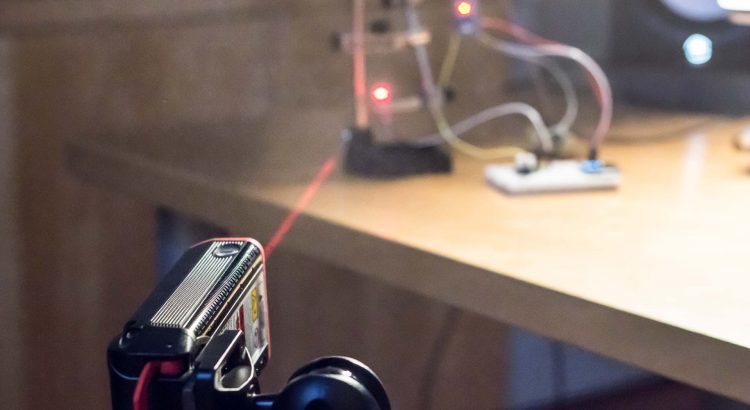
A laser is pointed to photoresistor which is connected to analog pin on the arduino. Using code below, you can read the value of analog ping (photoresistor) in range of 1 to 1000. The more photons fall on the photoresistor in a given time, the higher is the read value. The value of ambient light read from analog pin is in my case 400, and 800 while the laser is pointed at the photocell.
void setup() {
 Serial.begin(9600);
 }
 void loop() {
 Serial.println(analogRead(0));
}
We can use this to determine whether there is a clear path between laser and photocell or not. Now we just need a display and a button to start the timer. Well we can also wire a starting pistol instead. Here is my diagram: (R1, connected to button, is 10k and R2 is 1.5k)
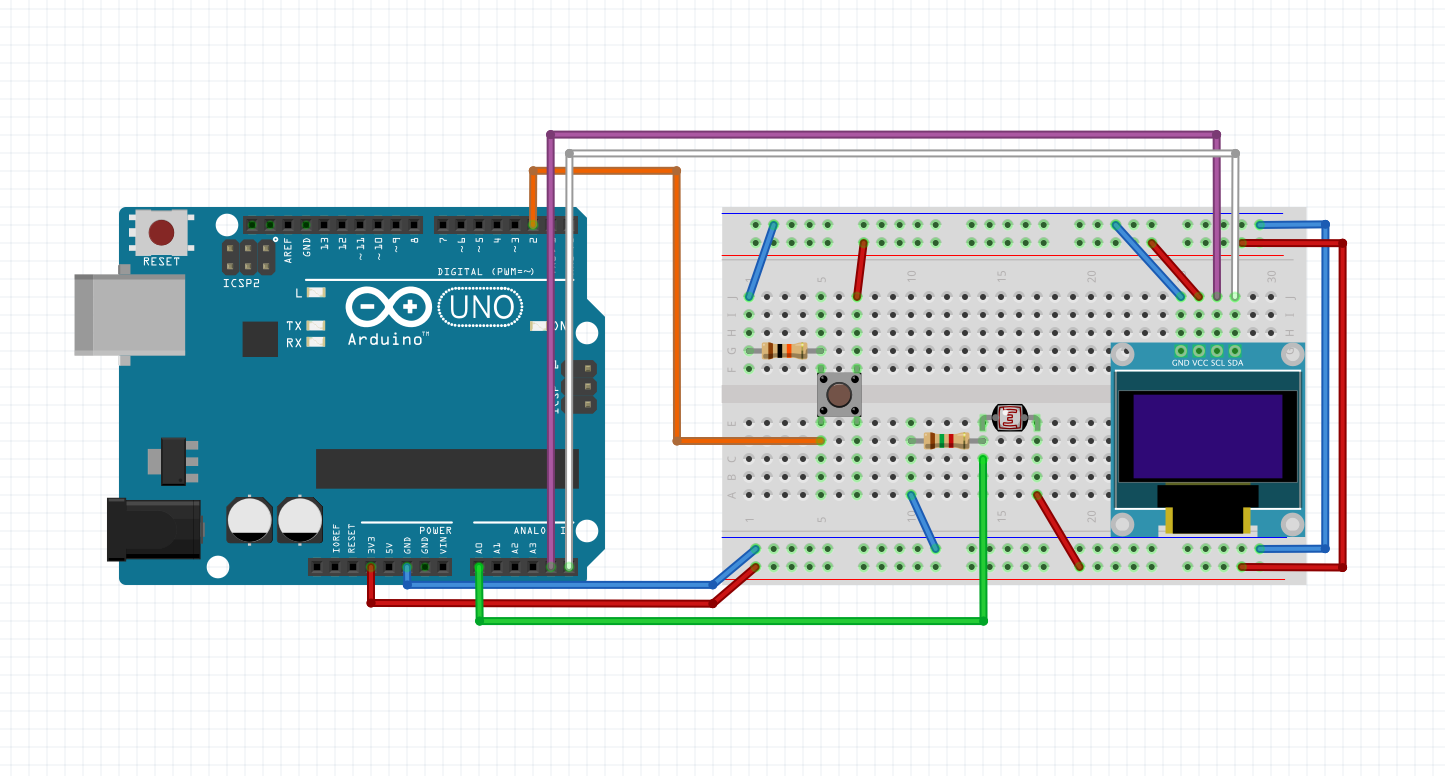
I used OLED 128×64 I2C display, which requires these two libraries: SSD1306 and GFX. You can use any Arduino compatible display.
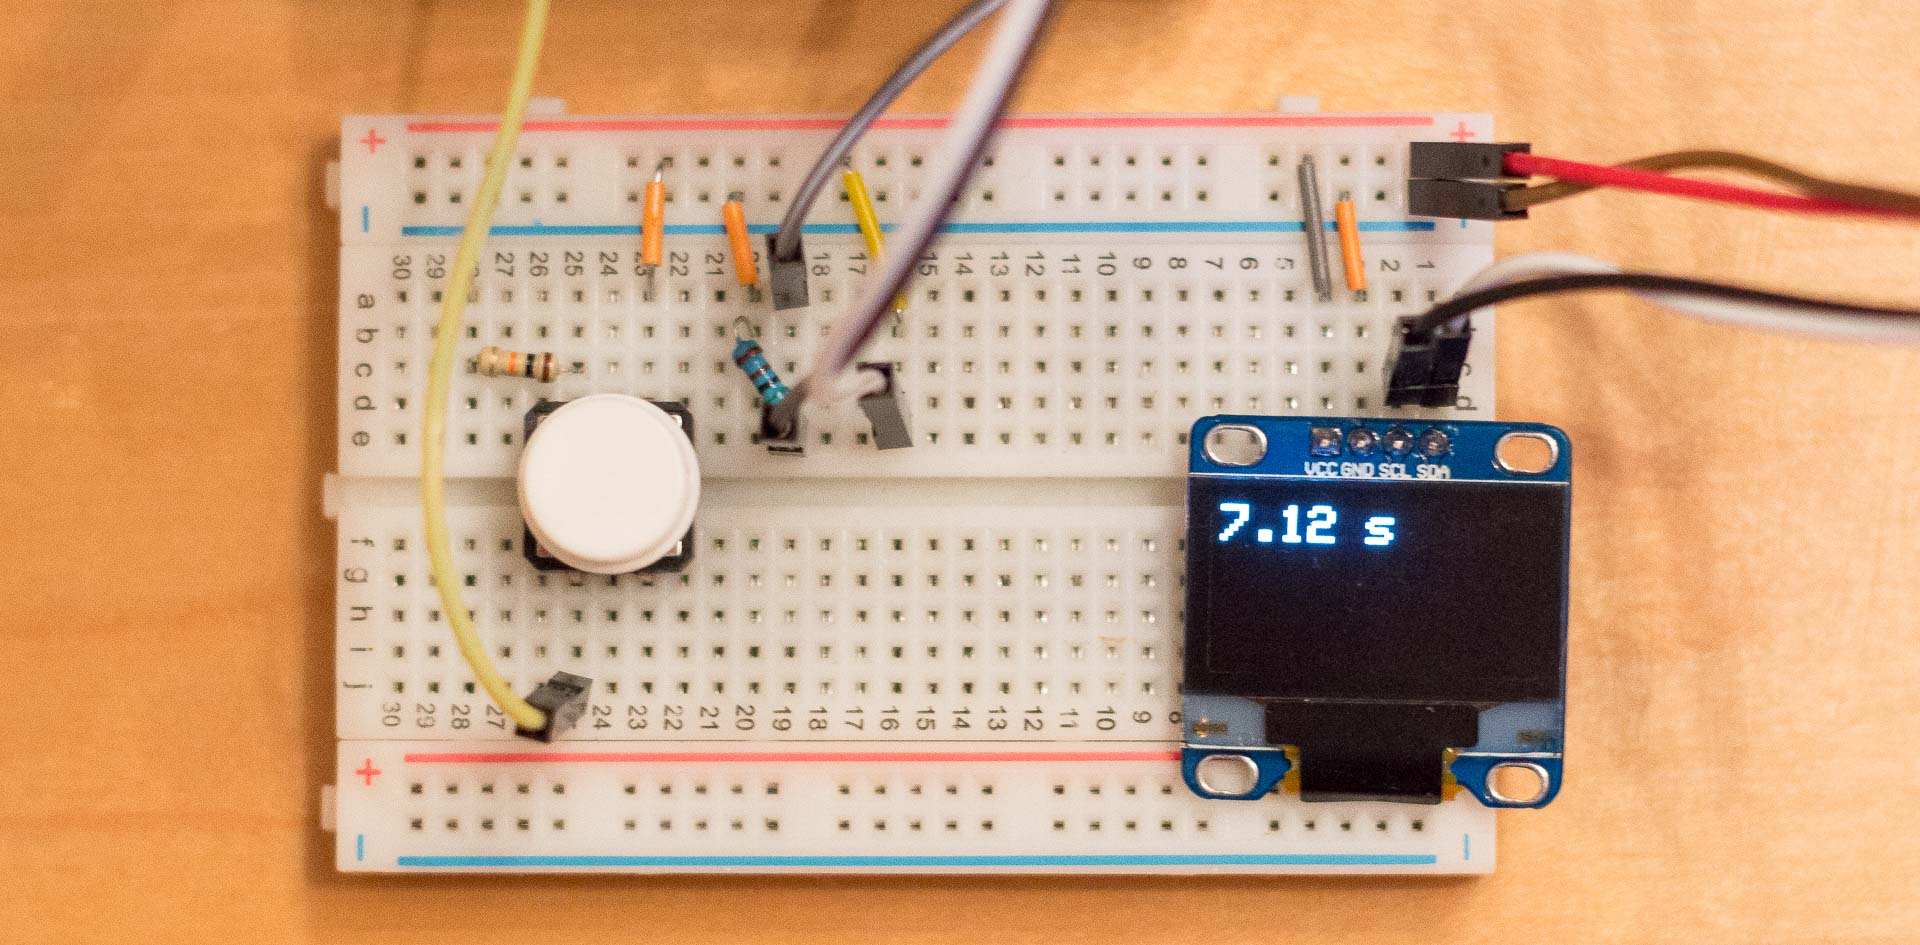
And here is my final code. For timing, I’m using millis() function, which returns the number of milliseconds since the Arduino board began running the current program. When the start button is pressed, it saves value of millis in a variable and also current value of photoResistor. Then the program is displaying current time and constantly checking value of photoresistor. If it drops below 90% of a value at the beginning, it means that the path between laser and photoresistor is broken.
When I first made the program in school, I made it stop the timer at this event. But if we are using it for running, where you need to cross the finish line, timer shouldn’t stop just yet. Instead, it should wait until runner goes past the line and then stop the timer. So it waits for laser to shine on the photoresistor again and then stops the timer.
//display
#include <SPI.h>
#include <Wire.h>
#include <Adafruit_GFX.h>
#include <Adafruit_SSD1306.h>
#define OLED_RESET 4
Adafruit_SSD1306 display(OLED_RESET);

//timer
unsigned long time;
unsigned long timeStop;
unsigned long startMs;
unsigned long timeEnd;
float seconds;
float secondsStop;

int buttonState = 0;
int photoResistor = 0;
int photoResistorStart = 0;
int photoResistorStop = 0;

int start = 0;

void displayTime(float currentTime){
  display.clearDisplay();
  display.setTextSize(2);
  display.setTextColor(WHITE);
  display.setCursor(0,0);
  display.print(currentTime); display.print(" s");
  display.display();
  return;
  }

void setup()   {
  Serial.begin(57600);
  //display
  display.begin(SSD1306_SWITCHCAPVCC, 0x3C);  // initialize with the I2C addr 0x3D (for the 128x64)
  display.clearDisplay();

  // start button
  pinMode(2, INPUT);
  delay(1000);

  //display start screen
  displayTime(0.00);
}


void loop() {
  photoResistor = analogRead(0);
  buttonState = digitalRead(2);

 if (buttonState == HIGH and start == 0) {
    photoResistorStart = analogRead(0);
    photoResistorStop = photoResistorStart * 0.9;
    start = 1;
    startMs = millis();
  }

  if (start == 1 and timeEnd == 0) {
    time = millis() - startMs;
    seconds = (float) time / 1000;
    displayTime(seconds);
  }

  if (photoResistor < photoResistorStop and timeEnd == 0) {
    while( photoResistor < photoResistorStop){
      photoResistor = analogRead(0);
      time = millis() - startMs;
      seconds = (float) time / 1000;
      displayTime(seconds);
    }
    timeStop = millis() - startMs;
    secondsStop = (float) time / 1000;
    displayTime(secondsStop);
    timeEnd = 1;
  }

  if (timeEnd == 1){
   displayTime(secondsStop);
  }
}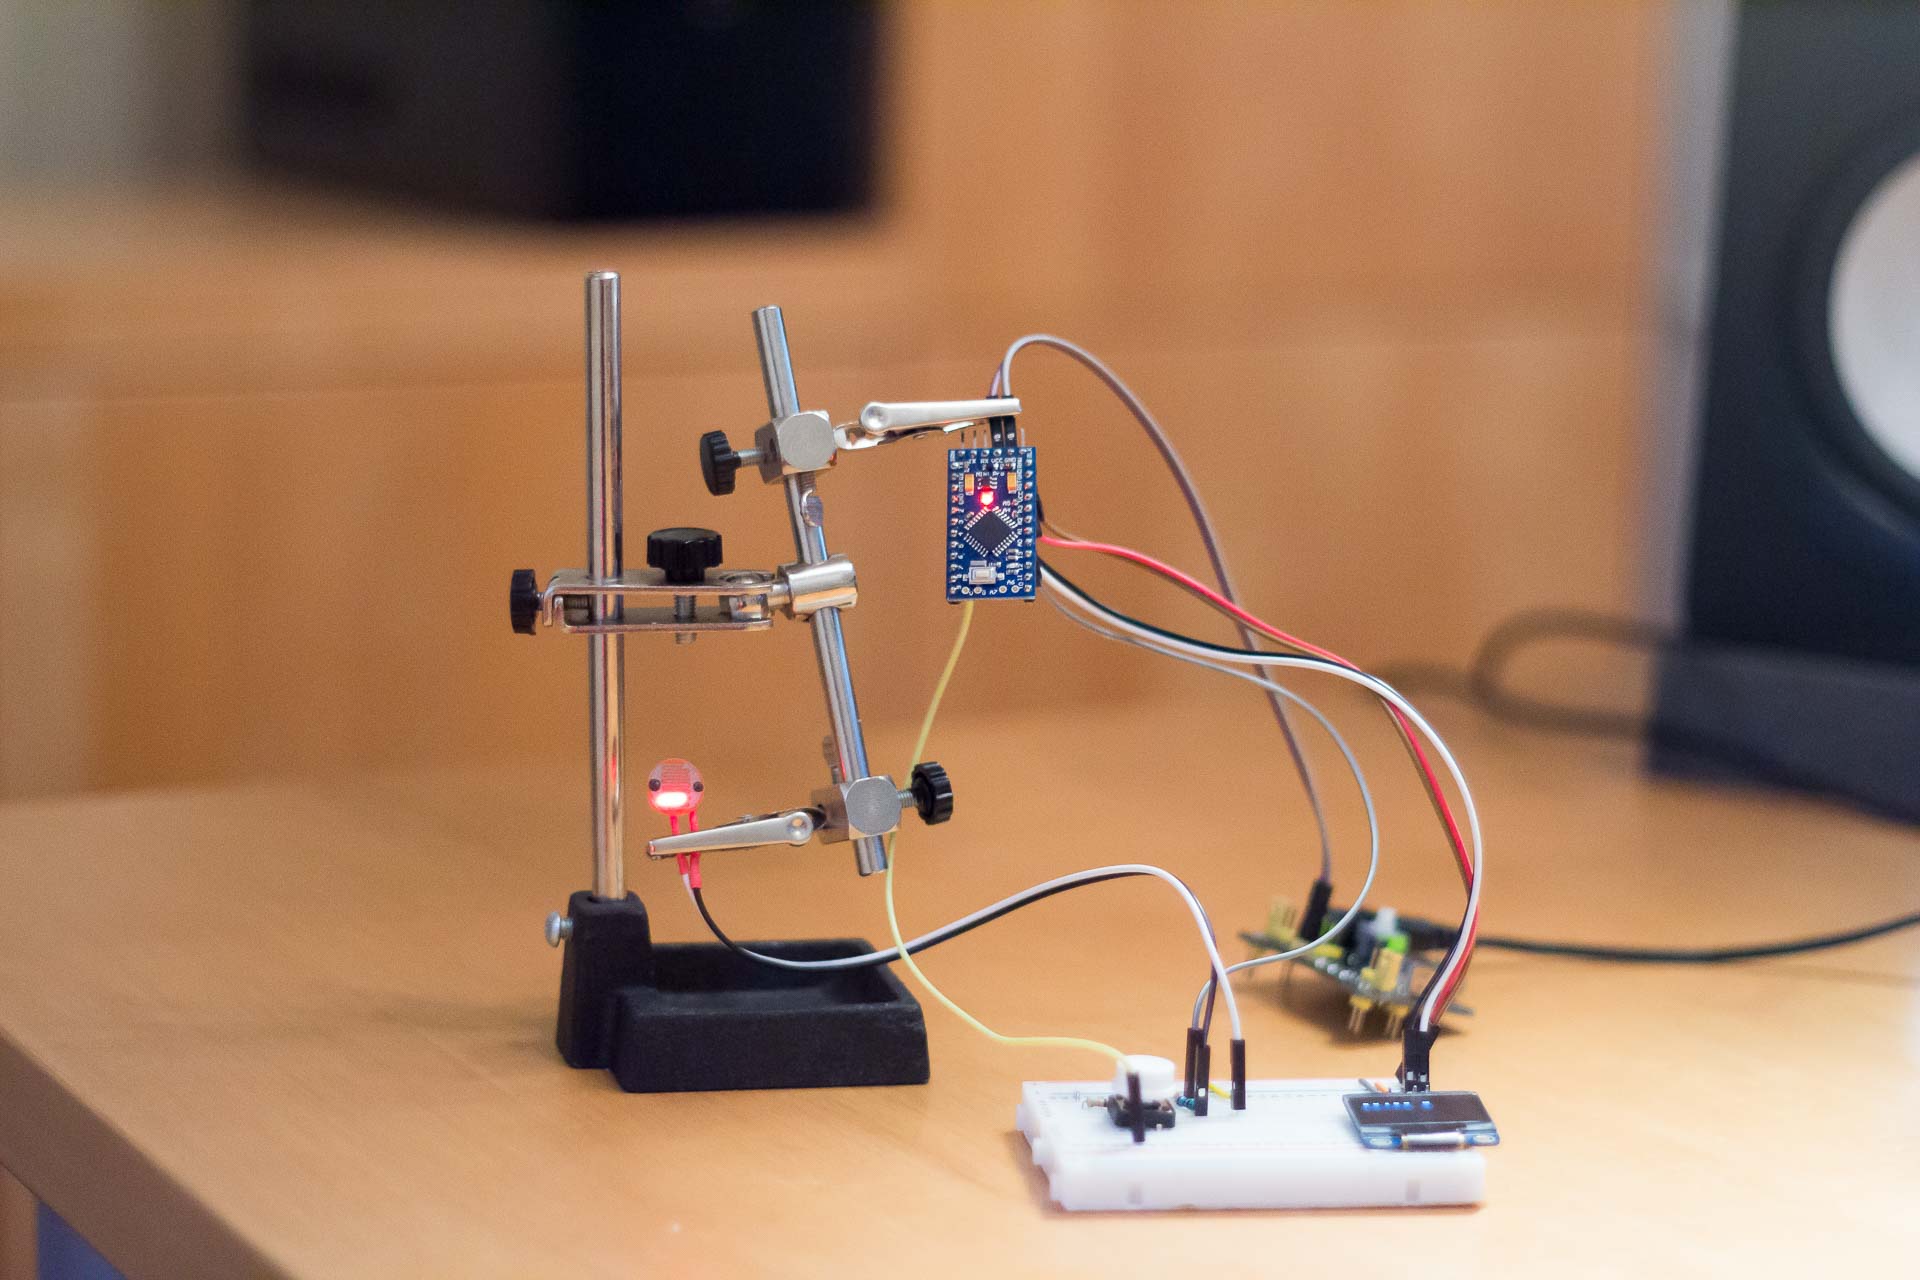
For now, timer can only store one value and if it was used outside on a bright day, difference between the values of ambient light and the laser on the photoresistor wouldn’t be sufficient. You can make cover for photoresistor so that only light from laser would fall on it, thus making the system more reliable. For keeping the laser directed, I used laser on distance meter, which I attached on camera tripod.
Here is a test video of my timer.


what if i use arduino uno?
There will be no difference.
Thanks for the tutorial, I’m having trouble getting the timer to start. Is the system triggered to start when the button is pushed, or does it require the photosensor to read a value AND the button to be pushed?
Hi Thomas,
Timer starts, when you push the button. Then it reads the value of photoresistor so it should start without it.
So the button starts the timer, and the code begins to run, waiting for something to break the laser, which causes it to stop?
Correct, but timer stops after laser reconnects again.
It’s in fact very complex in this busy life to listen nerws on TV,
therefore I only use weeb for that purpose, annd get the most recent information.
Hello, I do athletics and I would like to build a stopwatch to count time in my short run trials. Since the starter guy should be at the start line (100m, 200m from the finish line) would you advise to wire a long cable (is it simple to do it?) or to use a radio starting system? The importance is to maintain the precision of 0.01 s.
Thank you